


We leave digital footprints that are easily collected using an OSINT Framework anytime we do anything online. Whether we’re leaving a review on Yelp, commenting on a YouTube video, or posting to our social media accounts, our online activities paint a remarkably comprehensive picture of our personal lives. While these digital footprints may seem innocuous—after all, who isn’t online these days—in aggregate they can be extremely valuable to an adversary. The success of a social engineering attack hinges upon the availability of open-source intelligence (OSINT) that can be collected about a potential victim.
At Netragard, we help keep our clients secure by emulating the methodology of an advanced adversary and this always starts with collecting intelligence. One tool we use to collect and make sense of this intelligence is Maltego, a popular and powerful OSINT Framework. Maltego empowers analysts to collect and draw connections between various data points about a target in a visual node-based graph. Arguably its most powerful feature, aside from its graphical presentation of data, is its ability to integrate with all sorts of data sources, both free and subscription based. And if the dozens of integrations it comes with out-of-the-box aren’t enough, it can be extended to pull in information from pretty much any data source you can think of through custom integrations. In this post, we’ll demonstrate how to do that.
Writing a custom MaltEgo transform
The data source we’ll be using is called Sherlock, another OSINT Framework that allows you to search online accounts by username across hundreds of social networks. Maltego offers an excellent guide on building custom integrations, as well as an officially-supported Python library, so be sure to check those out. To get started, we’ll install the maltego-trx Python library and create a new project called maltego_sherlock:
					pip install maltego-trx
maltego-trx start maltego_sherlock
The created project will contain a few example transforms (Maltego’s word for a piece of code that fetches related information for a given input). We’re going to add a new file, Sherlock.py, to the transforms directory, which will contain our logic for pulling in data from Sherlock and returning it to Maltego in the expected format. At the top-level directory of our project, we’ll also need to clone the sherlock tool:
git clone https://github.com/sherlock-project/sherlock.git
In our Sherlock.py file, we’ll start by importing the needed classes from maltego-trx and sherlock, and create a class to hold our new transform:
					from extensions import registry
from maltego_trx.maltego import MaltegoMsg, MaltegoTransform, UIM_TYPES
from maltego_trx.transform import DiscoverableTransform

import sys
from os import path
sys.path.append(path.join(path.dirname(path.dirname( path.abspath(__file__))), "sherlock", "sherlock"))
from sherlock import sherlock
from result import QueryStatus
from notify import QueryNotify
from sites import SitesInformation

@registry.register_transform(display_name="To Social Media Accounts",
                             input_entity="maltego.Alias",
                             description='Hunt down social media accounts by username across social networks',
                             output_entities=["maltego.Affiliation"])
class Sherlock(DiscoverableTransform):
    @classmethod
    def create_entities(cls, request: MaltegoMsg, response: MaltegoTransform):
        pass
Note in the @registry.register_transform decorator that we declare our input entity from Maltego to be an Alias, and our output entity (which is the type of data we return to Maltego) is an Affiliation.
In the body of our create_entities method, we’ll first get the username to lookup using the request.Value property. After that, we’ll create a dictionary of websites to search using a JSON file that comes with sherlock:
					@classmethod
    def create_entities(cls, request: MaltegoMsg, response: MaltegoTransform):
        username = request.Value

        sites = SitesInformation(
            path.join(path.dirname(path.dirname(__file__)), 'sherlock', 'sherlock', 'resources', 'data.json')
        )
        site_data = {site.name: site.information for site in sites}
To do the actual lookup, we simply call the sherlock function that we imported earlier, passing it the username to lookup and the dictionary of websites to search (as well as an empty QueryNotify class—we’ll talk about that later):
					results = sherlock(
            username,
            site_data,
            QueryNotify()
        )
Finally, we take the list of results and, for any that got a positive match, turn them into Affiliation entities that Maltego is expecting:
					for website_name, result in results.items():
            if result.get("status").status == QueryStatus.CLAIMED:
                entity = response.addEntity('maltego.affiliation', website_name)
                entity.addProperty('affiliation.network', displayName='Network', value=website_name)
                entity.addProperty('affiliation.uid', displayName='UID', value=username)
                entity.addProperty('affiliation.profile-url', displayName='Profile URL', value=result['url_user'])
And that’s really all there is to it. We could go ahead and import this local transform into our Maltego client and run it, but there’s one thing left that will make our transform more useful, and that’s logging. Remember that QueryNotify class we passed to the sherlock function? It’s a base class meant for logging that we can inherit from in order to produce logging output in our Maltego client. We’ll call our derived class QueryNotifyMaltego, and use a global variable to keep track of how many positive matches we get:
					# Global variable to count the number of results.
count = 0

class QueryNotifyMaltego(QueryNotify):
    def __init__(self, response, result=None, print_all=True):
        super().__init__(result)
        self.response = response
        self.print_all = print_all

    def start(self, message):
        self.response.addUIMessage(f'[*] Checking username {message} with sherlock')

    def update(self, result):
        self.result = result
        if result.status == QueryStatus.CLAIMED:
            self.countResults()
            self.response.addUIMessage(f'[+] {result.site_name}: {result.site_url_user}')
        elif result.status == QueryStatus.AVAILABLE:
            if self.print_all:
                self.response.addUIMessage(
                    f'[-] {result.site_name}: Not found!',
                    UIM_TYPES['debug']
                )
        elif result.status == QueryStatus.UNKNOWN:
            if self.print_all:
                self.response.addUIMessage(
                    f'[-] {result.site_name}: {result.context}',
                    UIM_TYPES['debug']
                )
        elif result.status == QueryStatus.ILLEGAL:
            if self.print_all:
                self.response.addUIMessage(
                    f'[-] {result.site_name}: Illegal Username Format For This Site!',
                    UIM_TYPES['partial']
                )
        else:
            self.response.addUIMessage(
                f'Unknown query status {result.status} for site {result.site_name}',
                UIM_TYPES['partial']
            )

    def finish(self, message=None):
        self.response.addUIMessage(f'[*] Search completed with {self.countResults() - 1} results')

    def countResults(self):
        global count
        count += 1
        return count
To use this new class, we’ll update the call to sherlock() in the create_entites method and pass it the response parameter:
					results = sherlock(
            username,
            site_data,
            QueryNotifyMaltego(response)
        )
Adding the transform to Maltego
Maltego has two types of transforms: TDS transforms and local transforms. TDS transforms run on a transform server, either on the public internet or an internal network, which the analyst’s Maltego desktop client connects to in order to pull in new data. Local transforms, on the other hand, run directly on the same computer that runs the analyst’s Maltego desktop client. While local transforms require less setup, they are finicky in that you need to specify the path to the correct Python interpreter, which must have the correct dependencies installed, as well as the working directory of the transform project. This can be a hassle for developers that have multiple Python versions and virtual environments installed on their machine. To make this a more foolproof and reproducible process, we’ll create a Docker image to containerize our transform along with the sherlock tool and all its dependencies.
To do this, we’ll create a Dockerfile in the root directory of our transform project with the following contents:
					FROM python:3.10-slim

RUN apt-get update && apt-get install -y \
    curl \
    && apt-get upgrade -y \
    && rm -rf /var/lib/apt/lists/*

WORKDIR /app/sherlock/

ENV SHERLOCK_VERSION 55c680fde1d6eb94e55870e1be6243c88732cea8

RUN curl -sSL https://github.com/sherlock-project/sherlock/archive/$SHERLOCK_VERSION.tar.gz \
    | tar -v -C /app/sherlock/ -xz --strip-components=1
RUN pip install --no-cache-dir --upgrade -r requirements.txt

WORKDIR /app/

COPY . .
RUN pip install --no-cache-dir --upgrade -r requirements.txt

ENTRYPOINT ["python3", "project.py", "local", "sherlock"]
Essentially, this Dockerfile downloads sherlock, installs its Python dependencies, then copies over our Maltego transform and its dependencies, and sets the entrypoint command to run the transform.
Next, we build the Docker image from the Dockerfile:
docker build –t maltego_sherlock .
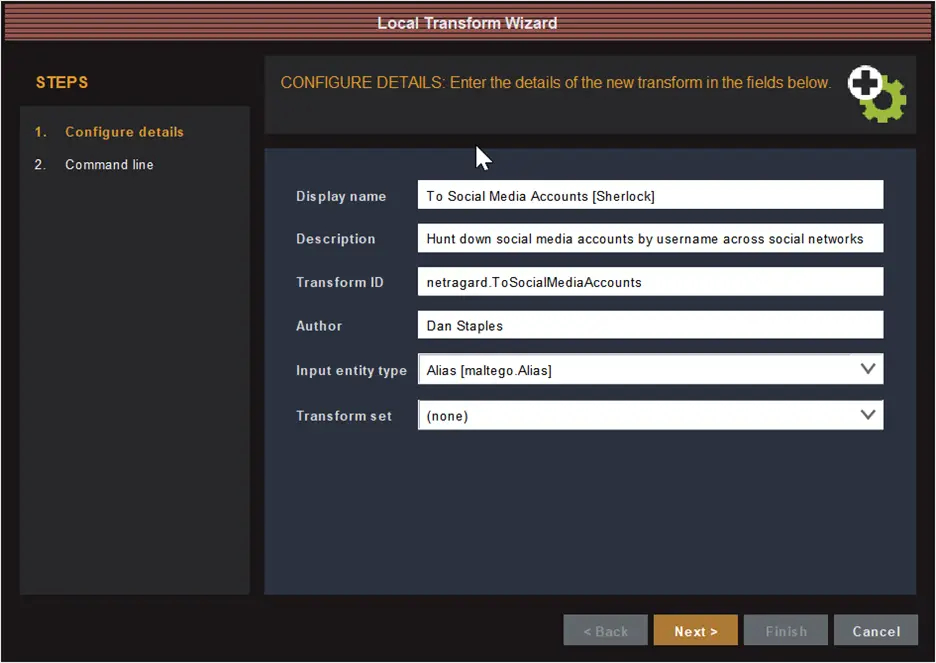
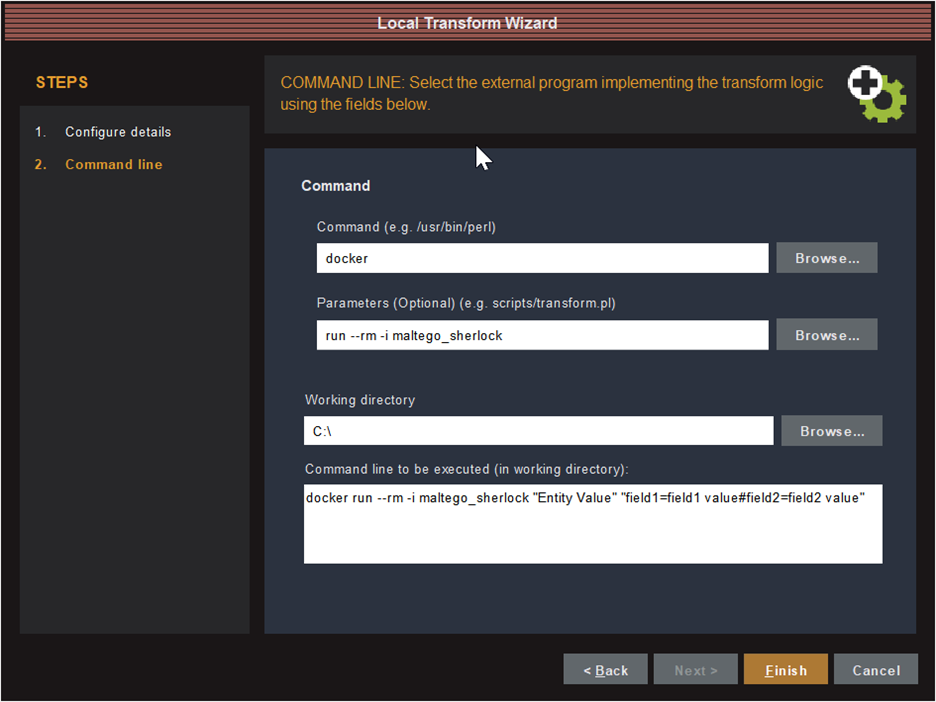
Since the Docker image we created contains the Python interpreter and all the required code, we don’t have to worry about specifying the correct interpreter path or working directory when adding the transform to our Maltego client; instead, we just need to tell it to run the Docker image. From our Maltego client we click on the “Transforms” tab in the ribbon bar and then the “New Local Transform” button to open the Local Transform Wizard:
Testing it out
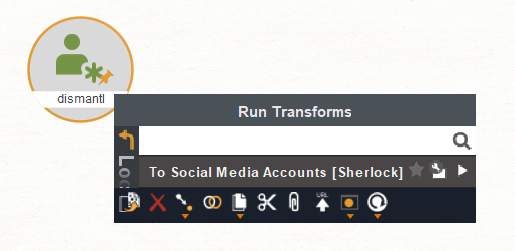
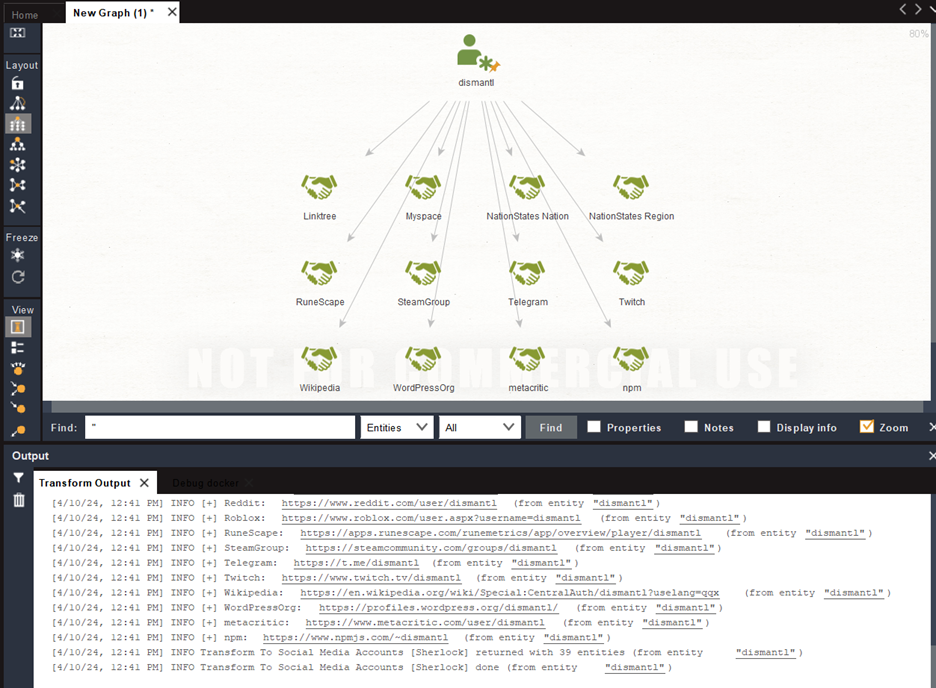
To test out our new transform, create a new graph and add a single Alias entity with the username we want to look up. Then right click on the Alias entity and select our new transform “To Social Media Accounts [Sherlock]”:
Conclusion
Hopefully this has given you a good idea of what’s involved in creating custom integrations for the MaltEgo OSINT Framework to enhance your investigations. If you’d like to see the full source code from this blog post, you can find it on our Github.
Written By:

Dan Staples is a Sr. Offensive Security Consultant at Netragard, bringing over a decade of experience in cybersecurity, software engineering, data science, and team leadership. Dan takes a multidisciplinary approach to his work and matches deep technical expertise with the ability to articulate complex security concepts to audiences of any background…>>Read Bio